Project Templates
Introduction
This document explains how to extend the New Project dialog with new categories and new template wizard pages.
Project Template Categories
Project templates in the New Project dialog have three category levels. Visual Studio for Mac and MonoDevelop define the following category levels.
- crossplat
- app
- forms
- native
- games
- library
- general
- tests
- general
- app
- ios
- app
- general
- games
- watch
- classic
- extension
- general
- watch
- library
- unified
- classic
- tests
- unified
- classic
- app
- android
- app
- general
- library
- general
- tests
- general
- app
- mac
- app
- general
- games
- classic
- library
- unified
- classic
- app
- other
- net
- general
- aspnet
- general
- misc
- generic
- c
- general
- unsupported
- monomac
- net
MonoDevelop’s categories are defined in the Templates.addin.xml file.
Visual Studio for Mac’s categories are defined in the Xamarin.Ide.addin.xml file.
Adding a Project Template to an Existing Category
To add your project template into one of the above categories all three category ids, one for each level, must be defined in the project template’s TemplateConfiguration section.
<TemplateConfiguration>
    <_Name>Console Project</_Name>
    <Category>other/net/general</Category>
    ...
</TemplateConfiguration>
If MonoDevelop cannot match the project template’s category path to any existing categories then it will be put in the other/misc/general category by default.
Adding New Project Template Categories
You are free to add your own third level categories. To add your own project template categories you can add them to your addin’s .addin.xml file:
<Extension path="/MonoDevelop/Ide/ProjectTemplateCategories">
    <Category id="toplevel" name="Top Level" icon="md-platform-other">
        <Category id="second-level-a" name="Second Level A">
            <Category id="third-level-a" name="Third Level A" />
        </Category>
        <Category id="second-level-b" name="Second Level B">
            <Category id="third-level-b" name="Third Level B" />
        </Category>
    </Category>
</Extension>
Only the top level category has an icon. These top level category icons are defined as resources in the .addin.xml file.
<Extension path="/MonoDevelop/Core/StockIcons">
  <StockIcon stockid="md-platform-other" resource="platform-other-light-16.png" size="Menu" />
</Extension>
The icons should be compiled as embedded resources in your addin.
MonoDevelop supports retina icons everywhere and to use them in the New Project dialog on a retina device just add a second embedded resource with a filename that has @2x just before the file extension.
- Non-retina resource:
platform-other-light-16.png - Retina resource:
platform-other-light-16@2x.png
The addin.xml file only needs to define the single StockIcon resource. MonoDevelop will automatically find and use the retina icon for a retina screen.
To insert a category before or after another existing category you can use the insertbefore or insertafter attributes. For example Visual Studio for Mac uses the insertbefore attribute to ensure its categories are inserted before those defined for MonoDevelop.
<Extension path="/MonoDevelop/Ide/ProjectTemplateCategories">
    <Category
        id="crossplat"
        name="Cross-platform"
        icon="md-platform-cross-platform"
        insertbefore="other">
    ...
</Extension>
Project Template Large Image
On the right hand side of the New Project dialog a project template can show a large image. If nothing is specified then the default image is displayed as shown below.

The large template images in MonoDevelop are 140 pixels high by 240 pixels wide.
You can provide your own template images either as embedded resources or as files copied to to a directory next to your addin.xml file.
Project Template Large Image - Embedded Resource
To reference a template image that is an embedded resource you specify the image resource in your .addin.xml file
<Extension path="/MonoDevelop/Ide/TemplateImages">
    <Image id="md-asp-project" resource="md-asp-project.png" />
</Extension>
Then specify the id for that image in the template’s TemplateConfiguration section
<TemplateConfiguration>
    ...
    <Image id="md-asp-project" />
    ...
</TemplateConfiguration>
You can also provide a retina image by adding the retina image as an embedded resource into your addin. In the example above the retina image would have the resource md-asp-project@2x.png
Project Template Image - File
To reference a template image that is available as a file and not embedded as a resource in the addin you should copy the image next to the template’s .xpt.xml file or in a subdirectory. The file can then be referenced in the project template’s TemplateConfiguration section using a path relative to the addin.
<TemplateConfiguration>
    ...
    <Image file="templates\md-asp-project.png" />
    ...
</TemplateConfiguration>
You can also provide a retina image and copy it next to the non-retina image file.
Grouping Project Templates
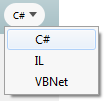
Similar project templates that differ only in the language (e.g. C#, F# or VB.NET) should be grouped together. The language specific project template will be selected in the New Project dialog via the language selector, as shown below:
To group a project template you specify the group id in the template’s TemplateConfiguration section.
<TemplateConfiguration>
    ...
    <GroupId>md-project-console</GroupId>
    ...
</TemplateConfiguration>
Group Conditions for a Project Template
A project template can also have a condition associated with it. This allows a parameter to be set by the project template wizard and then the New Project dialog will select a project template based on the condition if it matches.
The following project belongs to a group and will be selected if the Device parameter is set to IPhone
<TemplateConfiguration>
    ...
    <GroupId condition="Device=IPhone">md-project-group</GroupId>
    ...
</TemplateConfiguration>
The following project belongs to a group and will be selected if the Device parameter is set to IPhone and SupportsSizeClasses is true.
<TemplateConfiguration>
    ...
    <GroupId condition="Device=Device;SupportsSizeClasses=true">md-project-group</GroupId>
    ...
</TemplateConfiguration>
Conditionally Creating a Project in a Template
If a project template creates more than one project then it is possible to conditionally create the projects by using a simple boolean parameter defined by the project template wizard. To do this specify the boolean parameter with the if attribute as shown below.
<Project name="MyProj" directory="." type="PortableDotNet" if="CreatePortableDotNetProject">
</Project>
In the above example the Portable .NET project is only created if the CreatePortableDotNetProject parameter is true.
The conditions that can be specified do not support the more complicated condition that grouped templates do.
Conditionally Adding a NuGet Package from a Project Template
A NuGet package be conditionally installed based on a boolean parameter defined by the project template wizard.
<Packages>
    <Package id="Xamarin.GooglePlayServices" version="19.0.0.1" if="UseGooglePlayServices" />
</Packages>
The conditions that can be specified do not support the more complicated condition that grouped templates do.
Adding a Project Template Wizard
A project template wizard is registered with MonoDevelop in the addin’s .addin.xml file, as shown below.
<Extension path="/MonoDevelop/Ide/ProjectTemplateWizards">
    <Class id="MyWizard" class="MonoDevelop.MyProjectTemplateWizard" />
</Extension>
The id specified above is used in the project template to reference the wizard. The class attribute holds the full name of the class that implements the template wizard.
There are two classes that need to be implemented: TemplateWizard and WizardPage.
public class MyProjectTemplateWizard : TemplateWizard
{
    public override string Id {
        get { return "MyWizard"; }
    }

    public override WizardPage GetPage (int pageNumber)
    {
        return new MyProjectTemplateWizardPage (this);
    }
}
The TemplateWizard class is referenced via the .addin.xml file and its responsibility is to return a wizard page for a particular page and to hold the template parameters.
A template wizard can support multiple pages. If more than one page is supported then the TemplateWizard’s TotalPages property should be overridden and the number of wizard pages supported should be returned.
The TemplateWizard’s Parameters property holds a dictionary of template parameters:
ProjectCreateParameters Parameters { get; }
The TemplateWizard’s IsSupportedParameter method can be used to check if a particular parameter should be supported by a wizard. Note that if no supported parameters are defined by a project template then this method will return true.
bool IsSupportedParameter (string name);
The WizardPage provides the UI that is shown in the New Project dialog.
public class MyProjectTemplateWizardPage : WizardPage
{
    MyProjectTemplateWizard wizard;
    IMyProjectTemplateView view;

    public MyProjectTemplateWizardPage (MyTemplateWizard wizard)
    {
        this.wizard = wizard;
        CanMoveToNextPage = true;
    }

    protected override object CreateNativeWidget ()
    {
        if (view == null) {
            view = new GtkProjectConfigurationWidget ();
            view.WizardPage = this;
        }
        return view;
    }

    public override string Title {
      get { return GettextCatalog.GetString ("Configure your app"); }
    }

    protected override void Dispose (bool disposing)
    {
        if (view != null) {
            view.Dispose ();
            view = null;
        }
    }
}
The WizardPage should set the CanMoveToNextPage property to true or false to specify whether the Next button should be enabled or not.
The WizardPage should return a string in the Title property which will be used in the banner at the top of the dialog.
The WizardPage should return the UI widget from the CreateNativeWidget () method. This method would return a GTK# widget for Windows and a Xamarin.Mac control on the Mac. Currently all existing wizards are GTK# widgets and the New Project dialog itself is only available as a GTK# dialog.
The WizardPage can update the TemplateWizard Parameters with values specified in the UI. These parameters are then used when generating the project from the project template.
Using a Wizard in Project Template
A project template wizard can be referenced via its id in the template’s TemplateConfiguration section.
<TemplateConfiguration>
    ...
    <Wizard>MyWizard</Wizard>
    ...
</TemplateConfiguration>
Specifying Supported Parameters
A project template can specify the parameters that should be supported by the wizard that is used when creating the project.
The parameters defined here can be used to determine which parts of the wizard UI should be visible or enabled whilst creating the project. For example, in the Android project template wizard it is possible to hide the theme selection and the list of components by not specifying certain parameters in the supported parameters list.
<TemplateConfiguration>
    ...
    <SupportedParameters>AppName,AppIdentifier</SupportedParameters>
    ...
</TemplateConfiguration>
If no supported parameters are specified then the project template wizard assumes that they are all supported.
Specifying Default Template Parameter Values
A project template can specify the default values for parameters that the wizard uses when it is first displayed.
The default values can be used by the wizard to select particular items in the UI. For example, the iOS wizard will restrict the iOS versions shown in its drop down if the MinimumOSVersion parameter is specified.
The default parameters are defined in the TemplateConfiguration section.
<TemplateConfiguration>
    ...
    <DefaultParameters>MinimumOSVersion=8.0; Param2=value</DefaultParameters>
    ...
</TemplateConfiguration>